How to mount a NFS share for Teradek encoders
I had a tough time trying to figure out how to mount a NFS share with the PRISM rack servers, as it does not have any sort of media capabilities other than NFS, so here we are! Note; This will work with any of the PRISM/SERV lines as well, as it’s all pretty much the same firmware/experience.
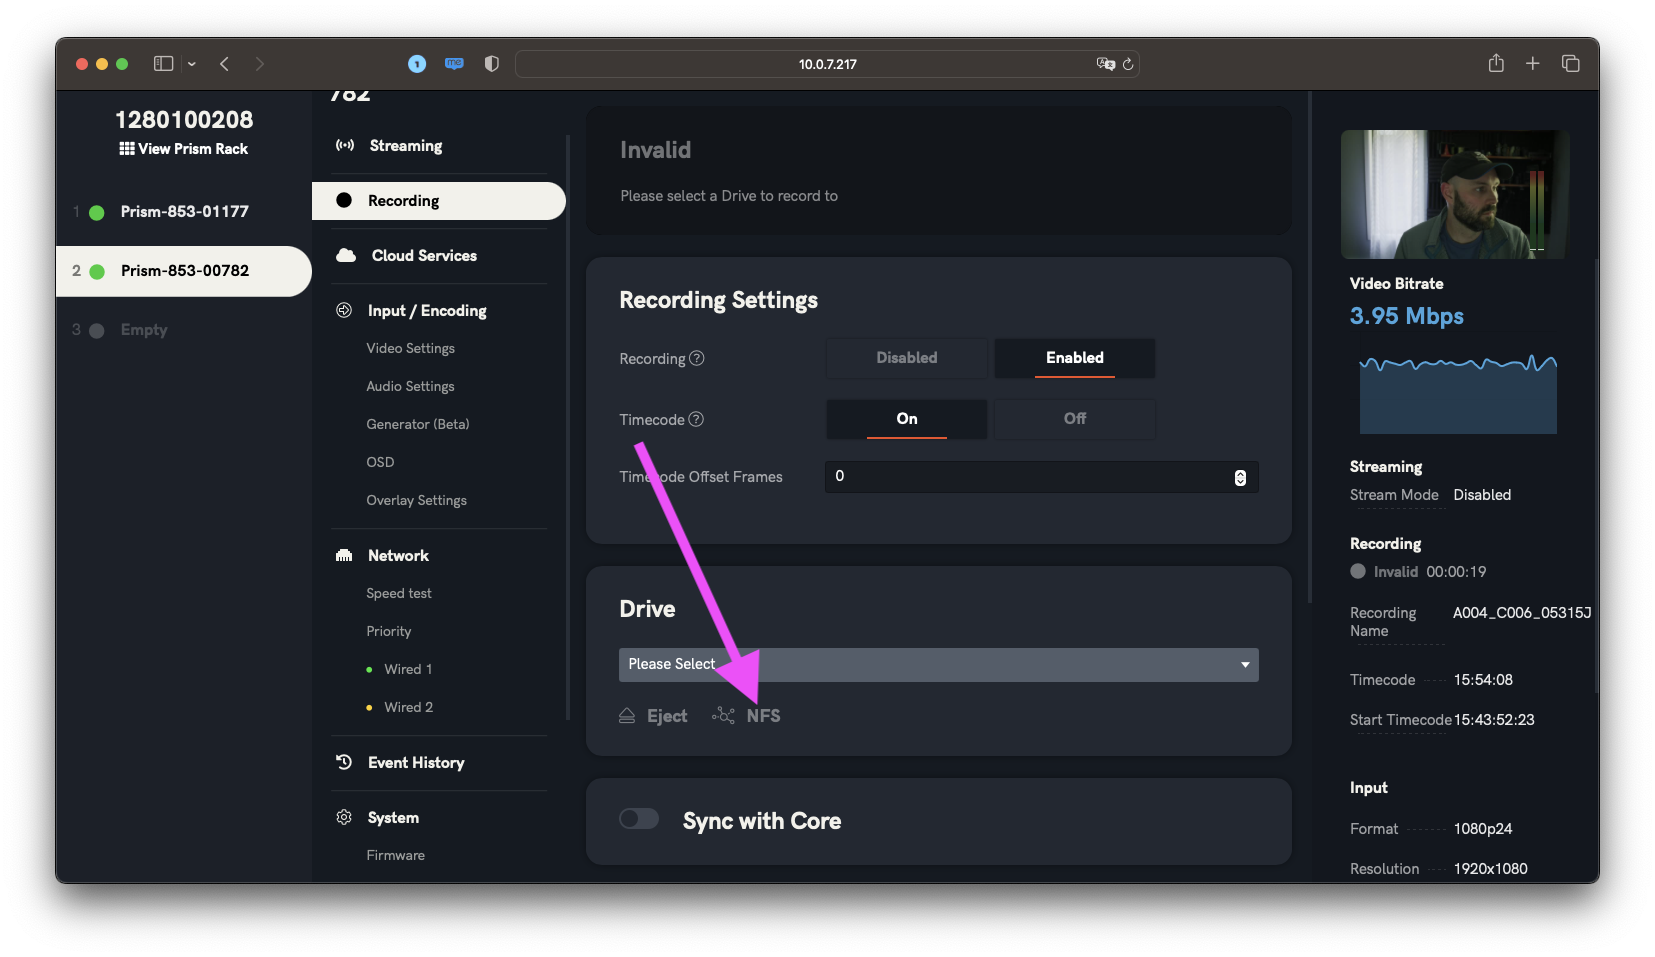
Under the RECORDING tab, you’ll see it ask you to please select under DRIVE. Normally you would select a SD card with a Prism Mobile, Serv4K, or Serv Micro, but in this instance we have to select the NFS option.
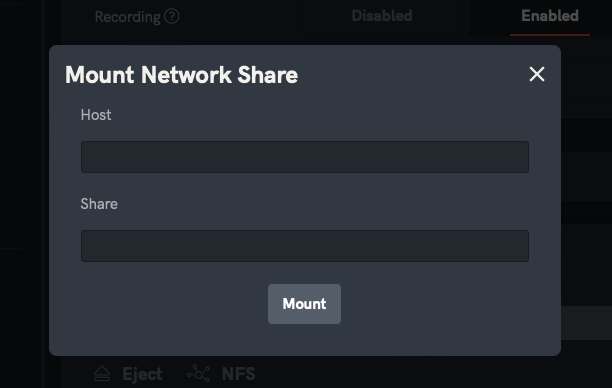
Selecting NFS brings you to this screen, where it asks you to specify a HOST & SHARE
Now unless you have all the knowledge about how to do this already, you’re probably like me and need to set up a NFS share. For this example I use my M1 Mac mini I have set up in my home network, and yes I am on the same network as my mini.
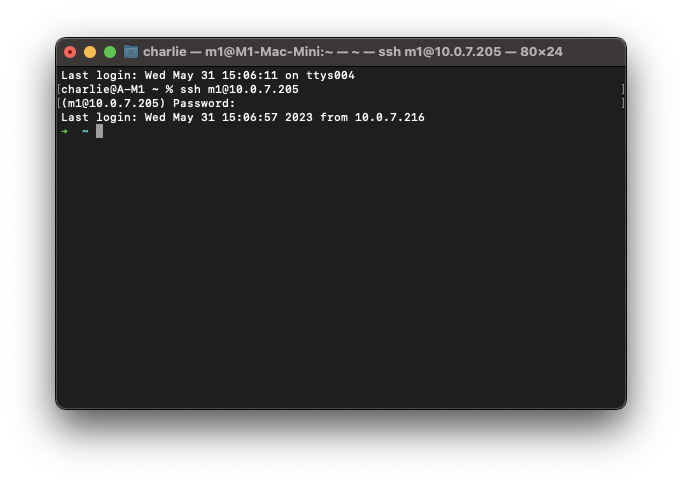
To start, open up terminal, and I’m going to SSH into my Mac mini, as I know it’s IP address on my network via LanScan:
For that I type:
ssh m1@10.0.7.205
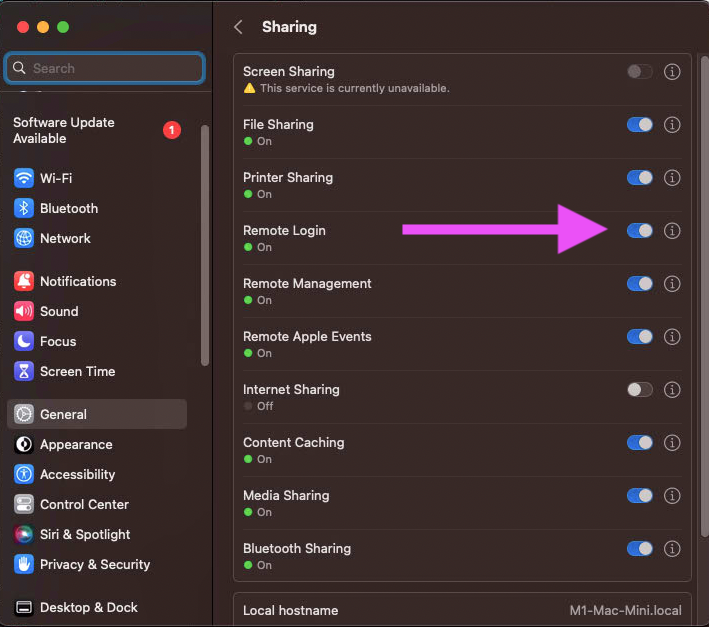
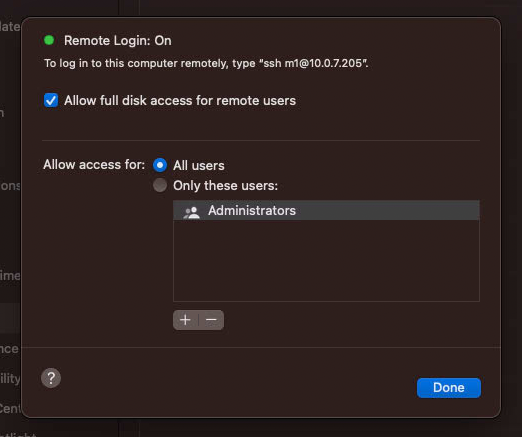
Where m1 is my user name, and 10.0.7.205 is the local IP address of my mini. Once you enter your PW you should get access! Btw if this is your first time running SSH, you may have to enable it on the Mini, and you can do that by enabling remote management/login under:
System settings > General > Sharing > Remote Login
BTW the SSH/remote portion is totally optional, you can do this on the same machine you’re using, it’s just easier for me to take screenshots as my mini is downstairs and I’m upstairs on a m1 laptop.
Now I have zsh as my framework/prompt, you will most likely have bash if you are doing this for the first time, so dont fret if it doesn’t look similar.
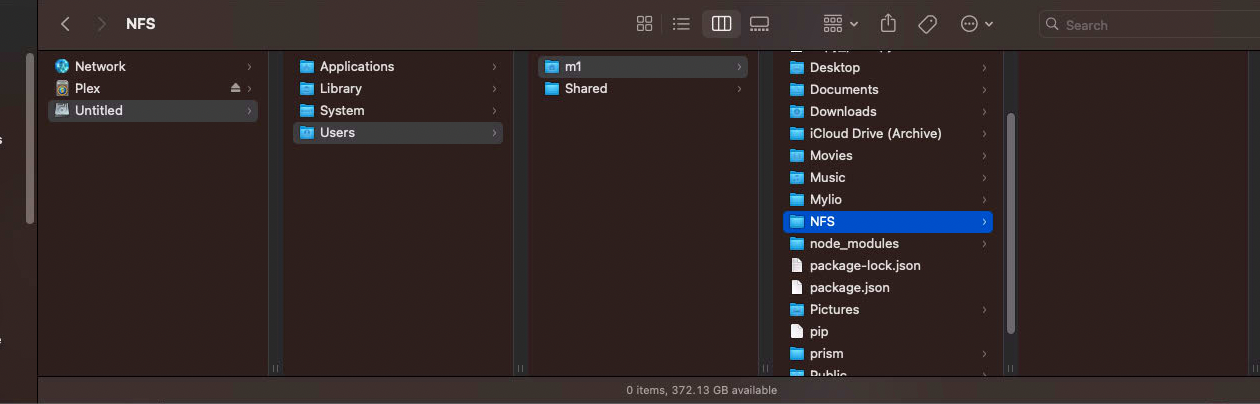
so now you have to make a folder on your Mac where you want the files to go for the NFS share, I just made one in my user folder (on my M1 mini btw) called NFS. BTW if you don’t see your hard drive in finder you can go to the top menu and select GO > COMPUTER and it will take you where you can select your internal HD.
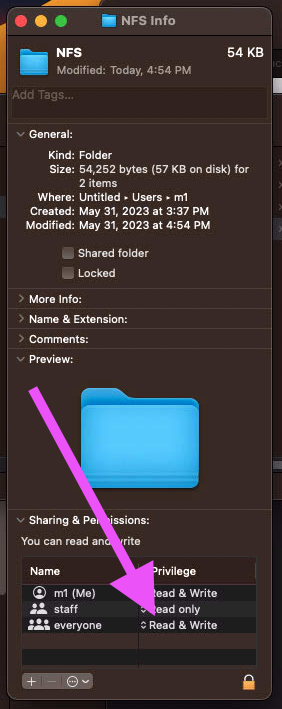
Next, right click on the folder and select GET INFO and then at the bottom you need to set the permissions of that folder to Read & Write for Everyone, otherwise the Teradek UI will tell you it’s an invalid recording directory.
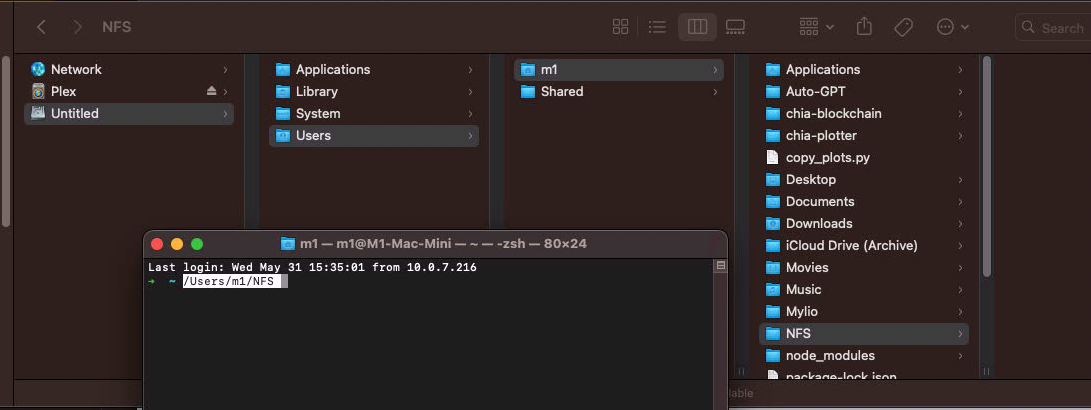
fun fact; if you didn’t know, you can drag a folder into terminal and it will show you where the path is to that folder (in case it gets complicated and you just want to copy/paste later).
Now go back to terminal and enter the following command:
sudo nano /etc/exports
You’ll have to enter your password here btw.
If this is the first time you’re doing this, it may be empty or it may not be! I have done this one before, so I have something in here.
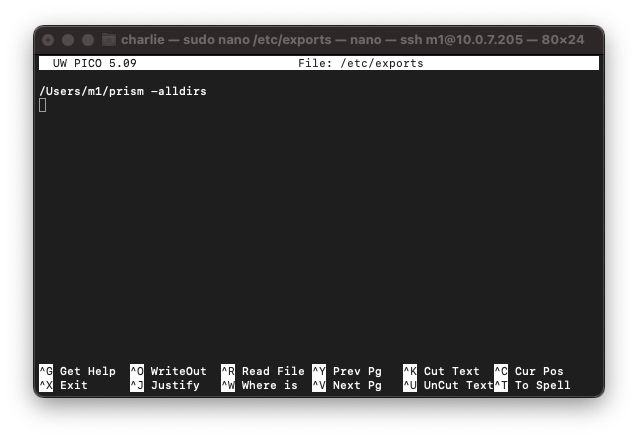
Now we’re just going to copy what I did previously. the -alldirs argument just means that the device has permissions to access all directories here. You may or mayn’t need this, but it works for me so I leave it.
Here’s what my file looks like.
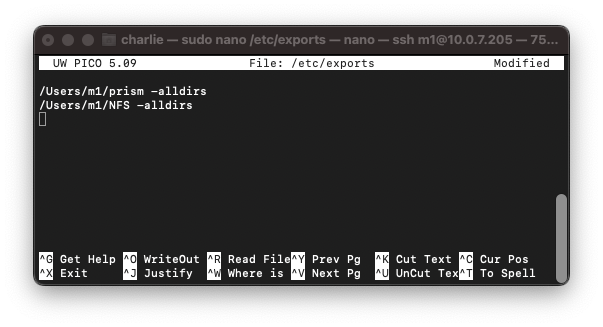
Now press CTRL + O to WriteOut the file, and then CTRL+X to Exit (this is the proper way to do it btw, I have a bad habit of just hitting CTRL-X, then Y, then RETURN which does the same thing, just muscle memory for me).
Now you can enter in terminal
showmount -e
and it should show you what you have mounted for NFS.
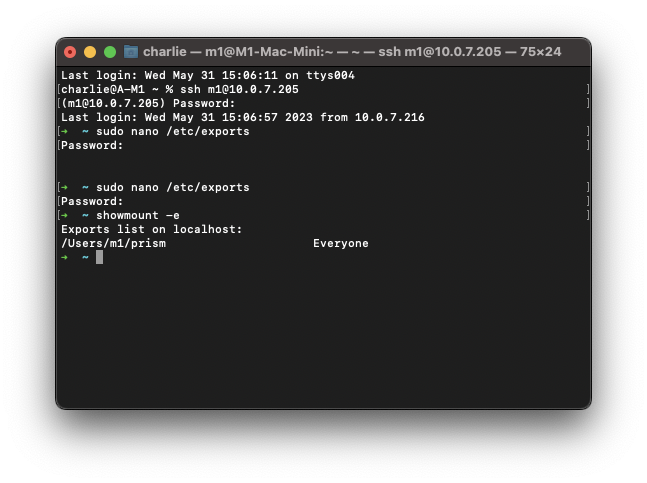
If it doesn’t, like mine doesn’t, then you need to restart your nfs service, which is just:
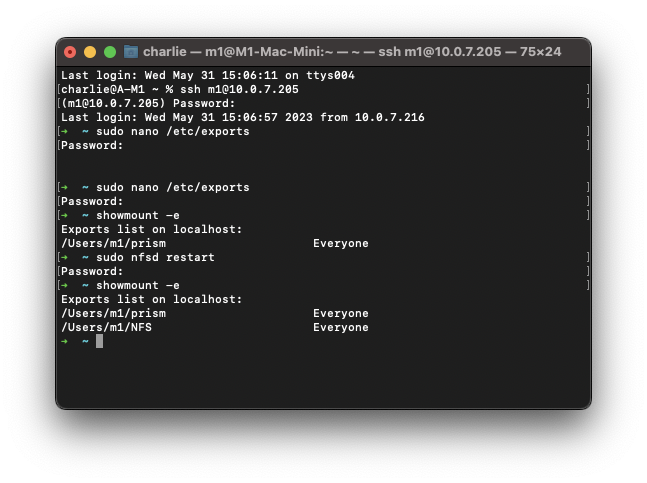
sudo nfsd restart
After entering your password, you can re-type show mount -e or just hit the up arrow on your keyboard until it repopulates. Now you should see it there.
Okay, back to the Teradek.
For HOST you want to enter in the IP address of the computer you just made the NFS share on. For me, that’s my M1 Mac mini in which I know the ip address of.
For the SHARE, you want to put the same info as you had in the /etc/exports file. My screen looks like this.
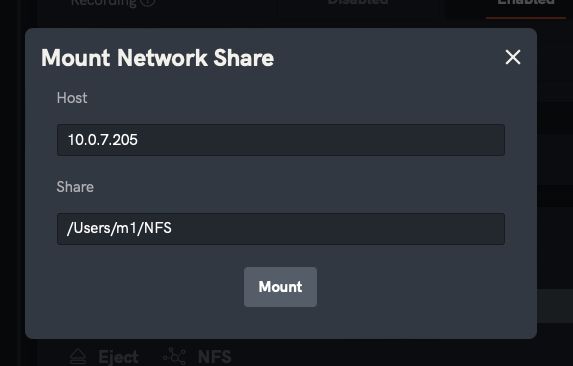
Hit mount and you should be greeted with a screen that shows you the available space of the NFS mount you made.
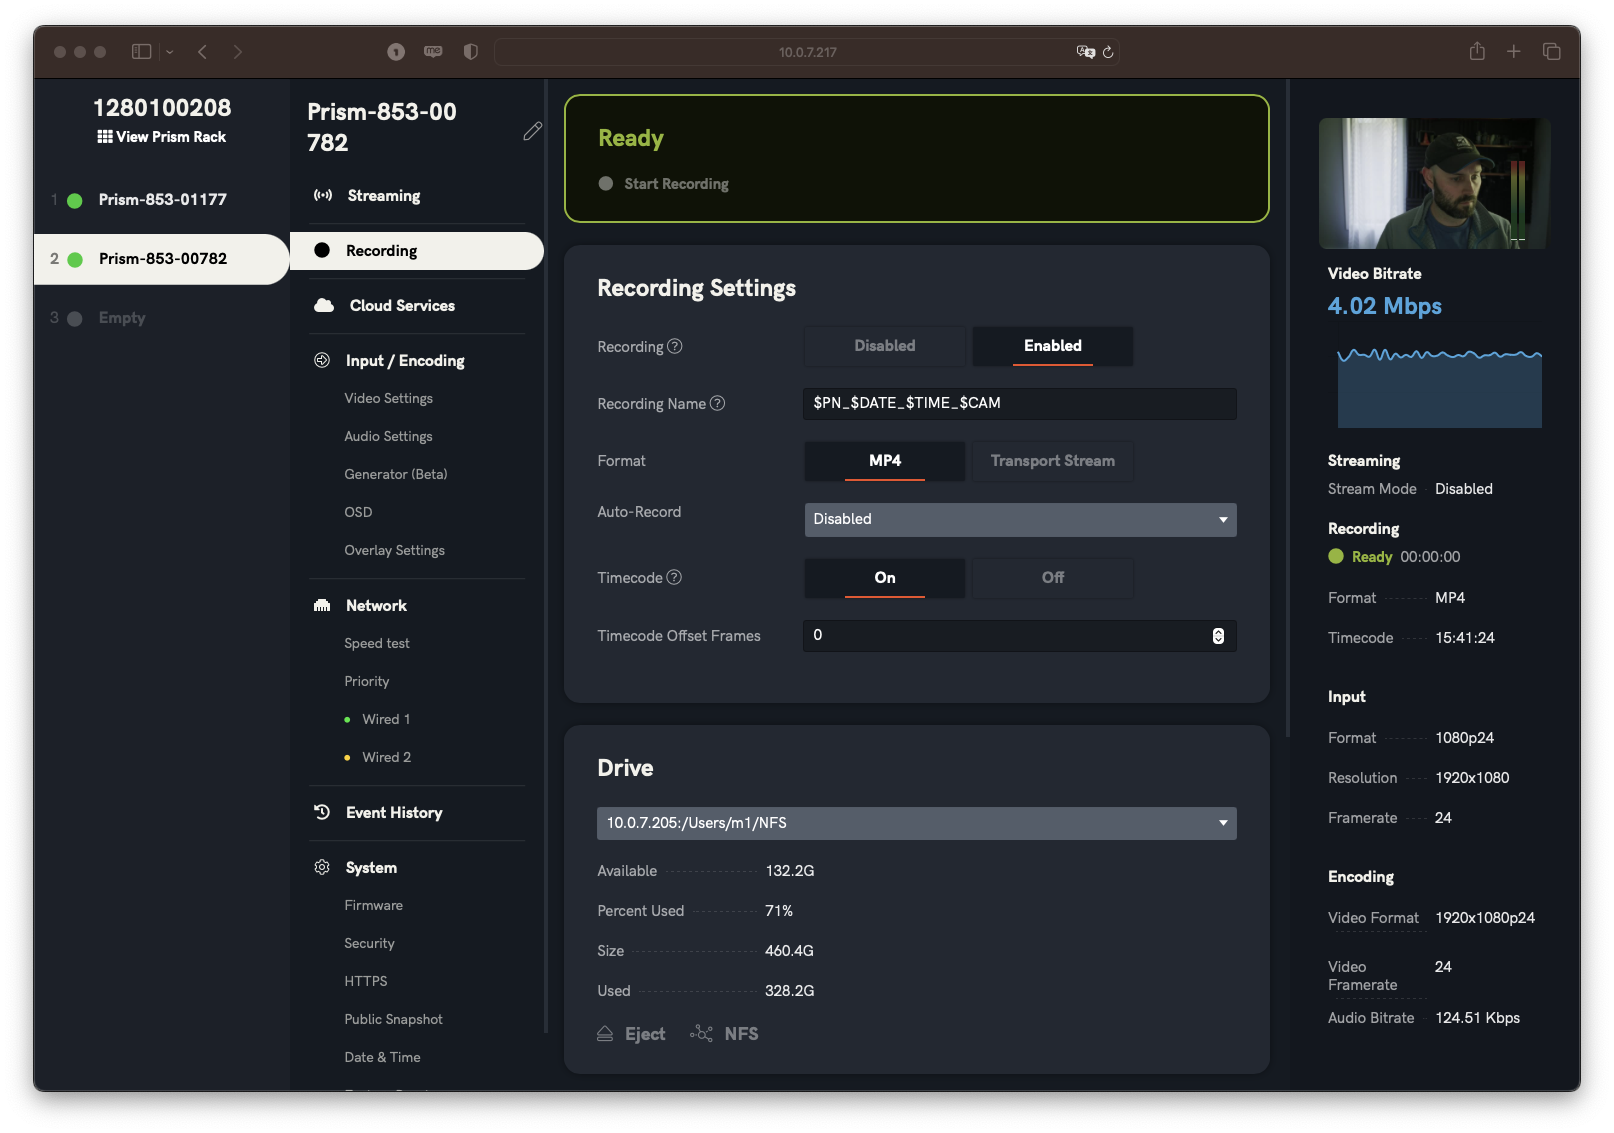
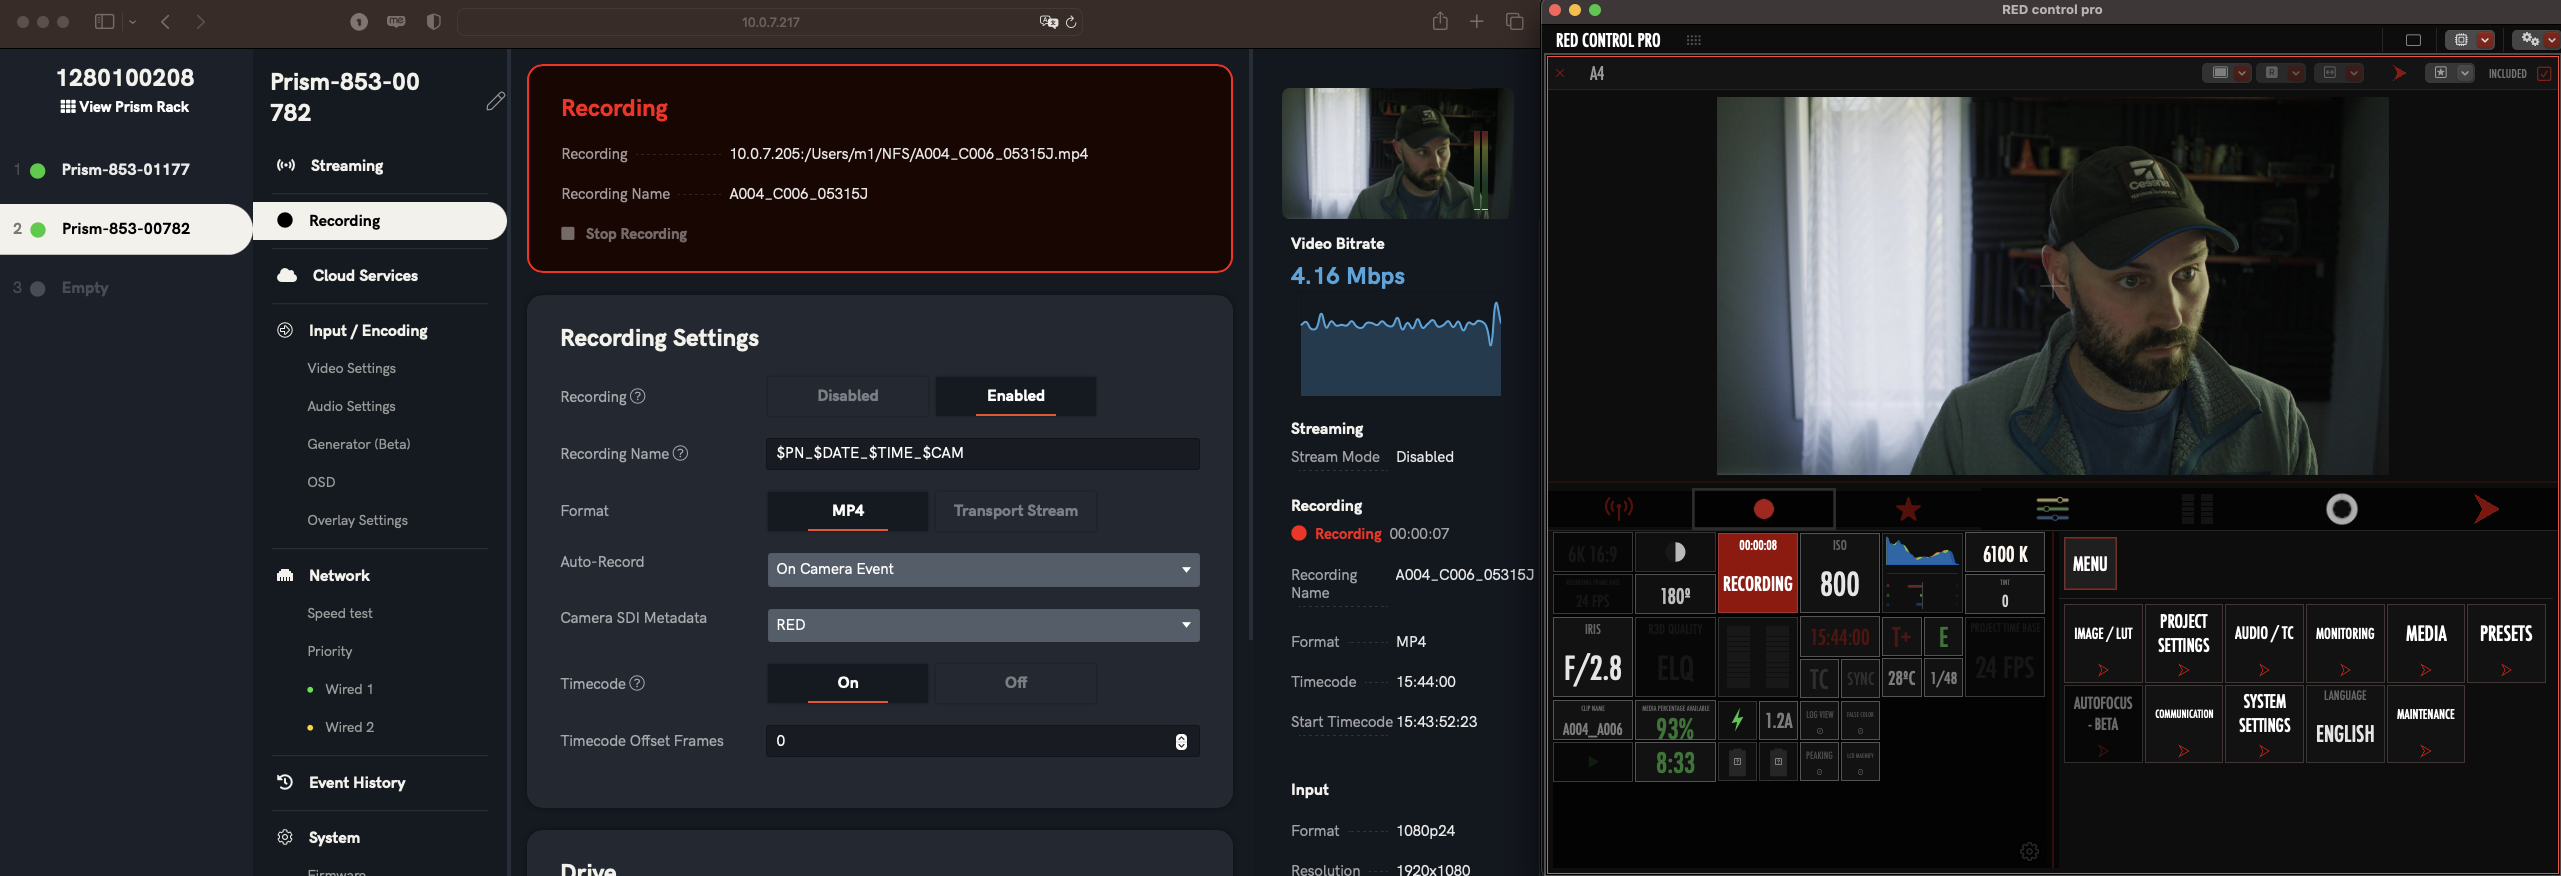
Now once I change my Auto-Record to On Camera Event and then set it to RED I can hit record on my camera and it will record automatically on my Prism/Serv and place the file in the folder we told it to.
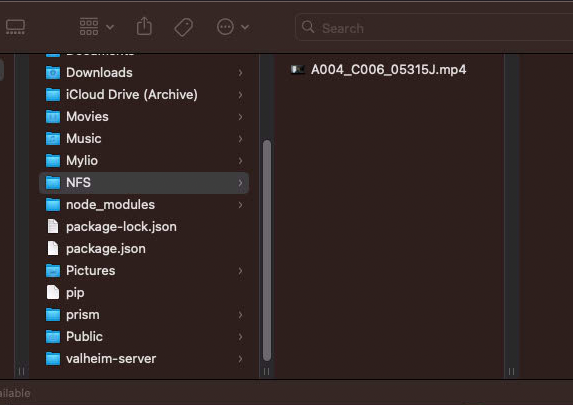
And that’s pretty much it! You can get more in depth by adding folders for other devices and mounting them there, but then you’ll have to add each folder to the NFS share like we did above.
Let me know if you have any questions or problems but I’m happy to help where I can!
Hopefully will get back to writing more in-depth articles again soon!